Handstands – Adho Mukha Vrksasana – Handstand press up
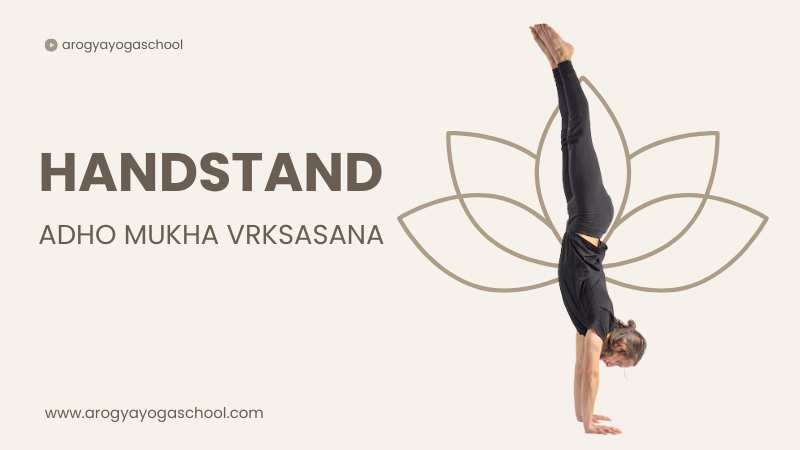
Adho Mukha Vrksasana, known as the Handstand Pose, is a tough yoga pose. It requires balancing the body upside down on the hands. The Name comes from Sanskrit:
- Adho Mukha translates to downward-facing
- Vrksa means tree, and
- Asana signifies pose.
- (Handstand or Downward-Facing Tree Pose)
This position visually resembles a sturdy tree standing upright on its roots, which in this case are the hands. This position strengthens your shoulders, arms, wrists, and core. It also increases your body awareness, builds your confidence, and improves your concentration. Doing handstands improves blood flow and wakes up the nervous system, giving you more energy.
To do Adho Mukha Vrksasana, begin in a Downward-Facing Dog position close to a wall (wall handstands
). Shift your weight onto your hands, tighten your core, and kick one leg up, then the other. To balance, push through your palms and engage your legs. If you’re a beginner, you can use the wall for support and work on your balance over time.
Some usual problems include being afraid of falling, having weak wrists, and not being in the right position. To tackle these challenges, warm up your wrists, keep working on your core strength, and practice regularly. Controlling your breath is also important to stay steady.
Practicing Handstands regularly builds confidence, resilience, and mindfulness. They are usually part of advanced yoga practices to build strength and enhance balance. With patience and effort, Adho Mukha Vrksasana can become a fun way to express balance and inner strength.
how to do a handstand for beginners
Embarking on the journey of learning plank position can be an enjoyable yet demanding experience for novices. It necessitates a blend of strength, balance, and regular practice. Here are essential tips and steps for beginners to safely embark on their perfect Downward-Facing Tree Pose:
Develop Strength and Flexibility
- Concentrate on enhancing your shoulder, arm, and core strength through exercises such as planks, push-ups, and hollow-body holds.
- Work on wrist flexibility and strength with stretching exercises and circular movements.
Utilize Wall Support
- Begin by practicing your kick-up into a handstand against a wall for stability.
- You can either face the wall or position your back towards it based on what feels comfortable for you.
- Allow the wall to assist you in maintaining balance while ensuring correct alignment.
Enhance Your Balance
- Gradually lift one foot off the wall at a time to practice balancing.
- Aim to hold the position without depending on the wall as you gain confidence.
Prioritize Alignment
- Keep your hands positioned shoulder-width apart for optimal support.
- Engage your core muscles to avoid arching your back excessively.
- Maintain straightness in your body while pointing your toes to help with balance.
Incorporate Props and Assistance
- Use yoga blocks or enlist a partner’s help for additional stability during practice sessions.
- Consider working with an instructor or coach who can provide insights into technique and safety measures.
Start with Basic Inversions
- Familiarize yourself with poses like crow pose or headstands before attempting full handstands.
- Progress gradually as you build both confidence and strength over time.
Practice Regularly
- Set aside a few minutes each day specifically for handstand training.
- Remember to be patient with yourself and acknowledge small achievements along the way.
Health Benefits of Handstands
Integrating handstands into your exercise regimen can yield numerous advantages, impacting both your physical and mental well-being. Here are some notable benefits:
Physical Benefits of Adho Mukha Vrksasana
Boosts Upper Body Strength – Handstands work many muscles in the shoulders, arms, chest, and upper back. They are a great bodyweight exercise for building upper body strength.
Boosts Core Stability – Balancing in a handstand requires a strong core. This helps strengthen your abdominal and lower back muscles.
Improves Balance and Coordination – Doing handstands helps you feel your body’s position better, which improves your balance and coordination.
Increases Wrist and Shoulder Flexibility –
Regular practice makes your wrists and shoulders more flexible and stronger, which helps with other exercises and daily tasks.
Strengthens Bones – Handstands put weight on your arms, shoulders, and wrists, which increases arms straight bone density.
Promotes Better Blood Circulation –
Being upside down increases blood flow to your upper body, which may improve circulation, but do this carefully.
Mental Benefits of Adho Mukha Vrksasana
Enhances Concentration – Balancing upside down necessitates focus, sharpening both mental clarity and mindfulness.
Builds Self-Esteem – Successfully performing handstands can foster a sense of accomplishment that elevates self-confidence.
Alleviates Stress –
Inverted positions are known for their soothing effects on the nervous system, fostering relaxation while reducing stress levels.
Functional Benefits of Handstands
Supports Athletic Performance – Handstands cultivate body awareness and strength that can enhance performance across various sports or physical activities.
Improves Functional Movement Skills –
Developing the balance, strength, and coordination required for handstands translates into enhanced functional fitness for daily activities.
Tips for Safe Handstand Practice
- Warm Up First: Prioritize wrist stretches, shoulder mobility exercises, and light cardio before starting.
- Use Support Initially: Begin by practicing against a wall or with assistance until you feel secure in your ability.
- Progress Gradually: Build foundational strength through preparatory exercises like planks or pike holds before attempting full handstands.
- Pay Attention to Your Body: Avoid pushing yourself too hard or practicing if you experience pain.
Handstand are a dynamic addition to any fitness program that offer substantial physical as well as mental benefits. Begin at a comfortable pace, keep practicing regularly, and enjoy the benefits!
Handstand press up
A handstand press-up, also known as a press to handstand, is a challenging skill found in gymnastics and yoga. It allows you to go from standing or sitting directly into a handstand without jumping. To master this technique, you need strength, flexibility, balance, and control.
Here’s how to do a Handstand Press-Up:
Warm-Up: Start by warming up your wrists, shoulders, core, and hamstrings with some light stretches and exercises.
Starting Position: Stand in a forward fold or sit in a straddle position. Place your hands firmly on the ground at shoulder width.
Engage the Core: Activate your core muscles and shift your weight onto your hands. Use your shoulders to help stabilize you.
Slowly raise your feet off the ground while keeping your legs straight. Control your movement as you lift your hips above your shoulders.
Handstand Hold: When your legs are overhead, tighten your core and find your balance in the handstand position.
Descent: Carefully lower your legs back to the starting position with control.
Handstand progression
To learn the handstand workout, you need to build strength and flexibility first. Start by strengthening your wrists, shoulders, and core, as these muscles help you hold your body weight and balance. Begin with wrist stretches and mobility exercises to get your hands ready. Add pike push-ups, overhead presses, and scapular shrugs to boost your shoulder strength, which is crucial for lifting into a handstand.
Next, work on your core. Do hollow body holds and planks to stabilize yourself when upside down.
Pay attention to your hamstrings! Keeping them flexible will help you kick up into a handstand more easily. Include forward bends, seated straddles, and leg stretches in your routine.
Stay dedicated to this training. Each session helps you prepare physically for your handstand journey. Enjoy the process and see how you grow stronger and more balanced with each effort.
how to get better at handstands
The time it takes to learn a handstand can vary for each person. This depends on factors like how strong they are, how flexible they are, their balance, and how does one learn to handstand.
how long does it take to learn a handstand-
Generally Beginners (who have never tried before) might need 3 to 12 months to hold a steady handstand.
People with some experience (who have some core and upper body strength) may take a few months if they practice regularly.
Experienced yogis (who have good balance and know their body well) could master it in just a few weeks.


